The Log Alerts feature allows you to proactively monitor important security and operational events from your log data. Alerts can be created in two ways:
Rule-based alerts – Simple, UI-driven conditions (e.g., event count, severity, source, hostname) that are easy to configure without writing queries.
Advanced alerts – Powered by ES|QL queries, allowing you to build complex conditions and patterns directly on your log data for advanced use cases.
How to Configure Alerts for logs:
Steps to Configure Alerts
- Log in to the Ceburu Portal
- Navigate to portal.ceburuai.com
- Go to Settings
- From the left navigation panel, click on Settings
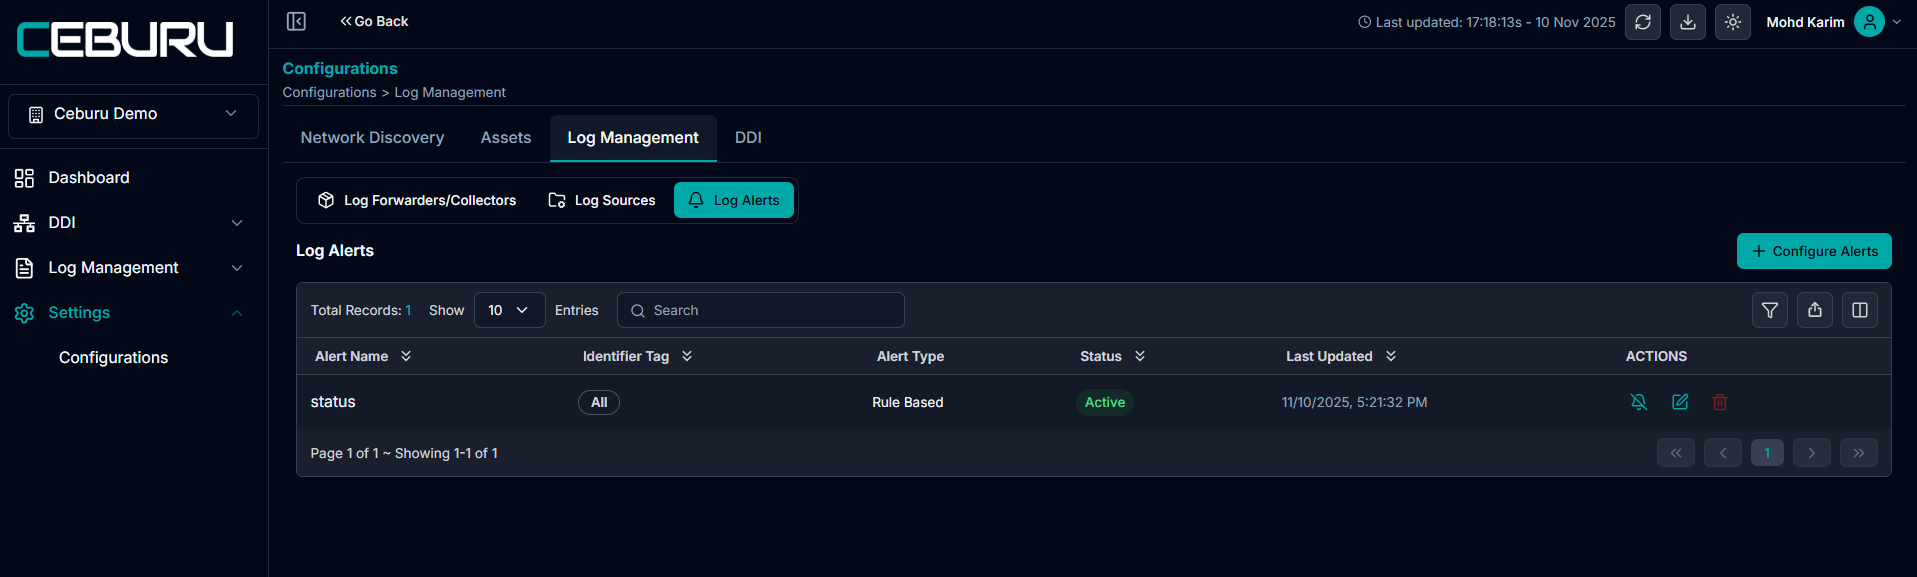
- Open Log Management
- Under the Configuration section, select Log Management.
- Access Alerts Section
- Inside Log Management, click on Alerts.

Configure a New Alert(Rule Based):
Click configure Alert.
Provide the following details:
1. Alert Name – A descriptive name for the alert.
2. Identifier Tag – Select the Identifier to monitor.
3. Condition/Rule – Define the matching condition (e.g., keyword match, error code, severity level).
- You can configure alerts with multiple conditions by combining them using AND or OR operators.
AND Operator – Triggers the alert only when all specified conditions are met.
OR Operator – Triggers the alert when any one of the specified conditions is met.
- This flexibility allows you to define precise alert rules that match your monitoring requirements.
4. Thresholds – Set the number of occurrences or frequency that should trigger the alert.
5. Notification Channels – Choose how alerts should be delivered.
Once configured, click Save to activate the alert.


Configure a New Alert(Advanced):
Advanced alerts let you define conditions using a custom ES|QL query, ideal for complex or correlation-based detection.
Open Advanced Alert mode
Go to Log Management → Log Alerts.
Click Configure Alerts and select the Advanced tab.
Define the ES|QL query
Enter your query in the ES|QL editor.
- Click Run to execute the query.
- The Query Results panel will show the output fields and sample values
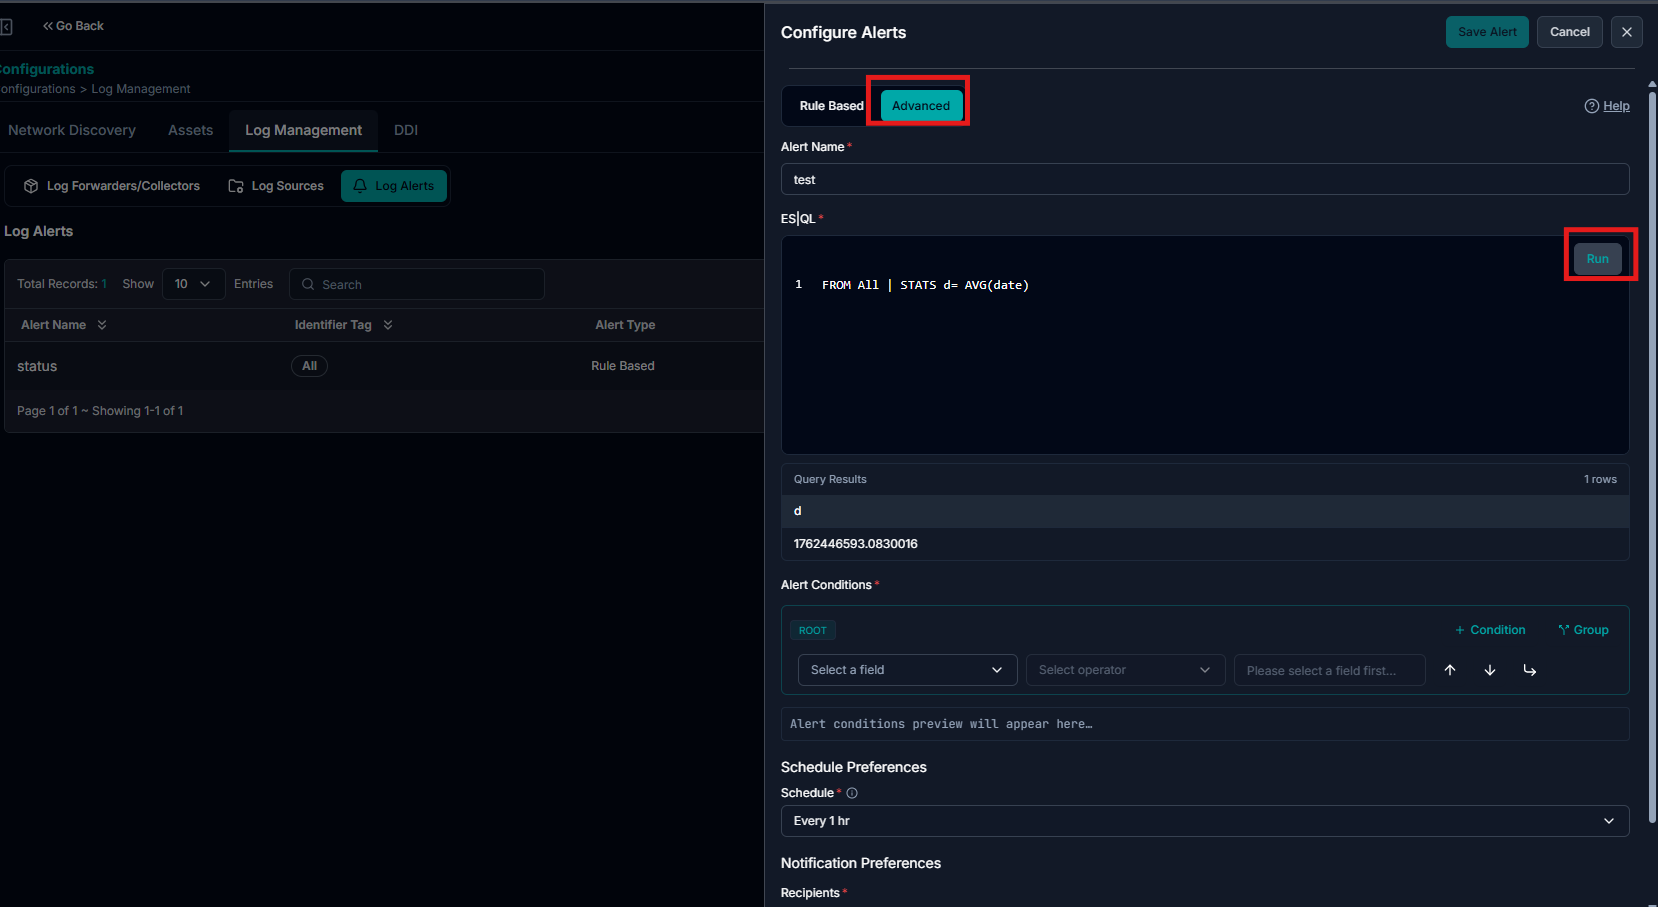
3. Configure alert conditions
Under Alert Conditions, choose a field from the query results (for example,
d).Select an operator (e.g., is, >, <, >=, etc.).
Provide the threshold or comparison value (for example,
1234).The condition preview will show how the rule is evaluated (e.g.,
d: "1234").
4. Set the schedule
In Schedule Preferences → Schedule, choose how often the alert should run
(e.g., Every 1 hr, Every 5 minutes, etc., depending on available options).
5. Select notification recipients
In Notification Preferences, choose the Recipient groups / user groups that should receive the alert.
Enable the preferred notification channel (e.g., Send Email) if available.
6. Save the alert
Review the alert name, ES|QL query, conditions, schedule, and recipients.
Click Save Alert.
The new alert will now appear in the Log Alerts list and will trigger whenever the ES|QL query results meet the configured condition.


Once alerts are successfully configured in Log Management, When an alert meets the defined threshold or condition they will appear in the Alerts section.
Navigate to Log Management > Alerts in the left-hand menu.

When an alert meets the defined threshold or condition, it will automatically appear in the Alerts tab.
Click on the Actions button next to the alert.
In the Assign To field, select the User or User Group responsible for handling the alert.
Optionally, add comments for context or instructions.
Set the status:
Active – Alert is open and needs attention.
Resolved – Issue has been fixed or handled.
Closed – Alert is completed and no further action is required.
Click Update to save the changes.

Was this article helpful?
That’s Great!
Thank you for your feedback
Sorry! We couldn't be helpful
Thank you for your feedback
Feedback sent
We appreciate your effort and will try to fix the article